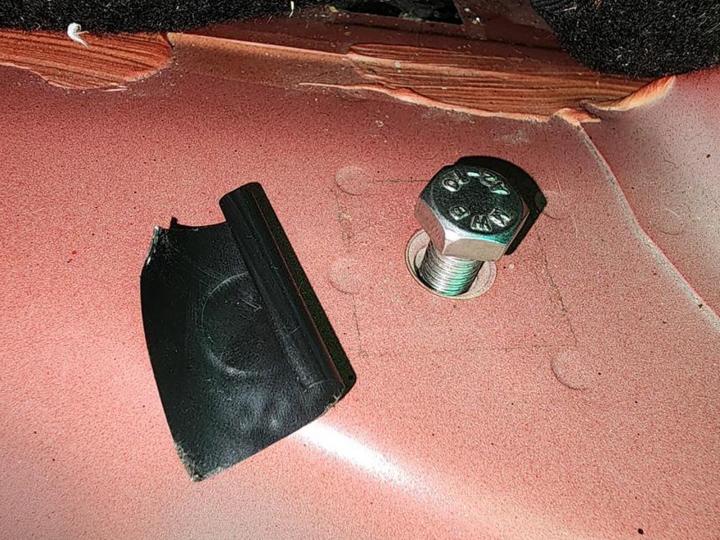
BHPian dkaile recently shared this with other enthusiasts:Earthing Point in the boot of Maruti cars:So I was searching for a Earthing Point in the Boot for a planned Stage 2 (or lets say Stage 1.5) Upgrade to the ICE with a Powered Subwoofer (more details about that soon in Stage 1 Speaker Upgrade Thread), that will be removable as well as shared between my 2 cars!! So just ahead of the spare tyre in the boot of the Baleno, there exists this, ‘Drilled from the Factory’, Earthing Point, which is covered by a Black adhesive tape. as visible in the picture – It is of a standard 10mm bolt size thread, as is visible with the 10mm SS bolt that I tried on. It was a perfect point for any amplifier or subwoofer grounding solution – I also tested the Earthing Point Resistance from another sure shot earthing bolt (ideally it should be tested from the battery negative) and the resistance was fluctuating between 0 & 1. Anything below 3 Ohms is acceptable. Perfect! – This is the location of the Rubber Grommet just behind the glove box into the engine bay, for routing your positive wire from the Battery to the powered subwoofer’s positive terminal – Also missed out previously on the Rear View of the Pioneer Stereo Fitted in the Baleno and here is the view of the 9″ Standard Android Frame as well as the Maruti Stereo Plug & Play Wire Harness (details of pricing etc. already shared earlier) – A close-up view with details explained – Cheers. Check out BHPian comments for more insights and information.